
Vegetable tikkis bring back the kind of warmth that wraps around you on a chilly evening, with familiar spices and crispy edges. I grew up nibbling on these as a kid, but lately I’ve been tweaking the recipe to make it a tad healthier without losing that nostalgic crunch. Making them at home feels like a small act of comfort, a way to reconnect with old flavors while still being kind to my body.
What I love about these tikkis is how adaptable they are—loaded with whatever vegetables I have lying around, they turn into a colorful, fragrant platter. It’s the kind of snack that invites sharing, yet it’s satisfying enough to eat on your own with a good chutney or yogurt. This recipe is a reminder that simple ingredients, handled well, can still deliver big, cozy flavor.
Focusing on the nostalgic comfort of vegetable tikkis with a modern twist, highlighting the balance between traditional flavors and contemporary dietary tweaks.
Nostalgic bites with a modern twist
- These tikkis remind me of lazy Sunday afternoons at my grandma’s house, where the air was filled with cumin and frying spices.
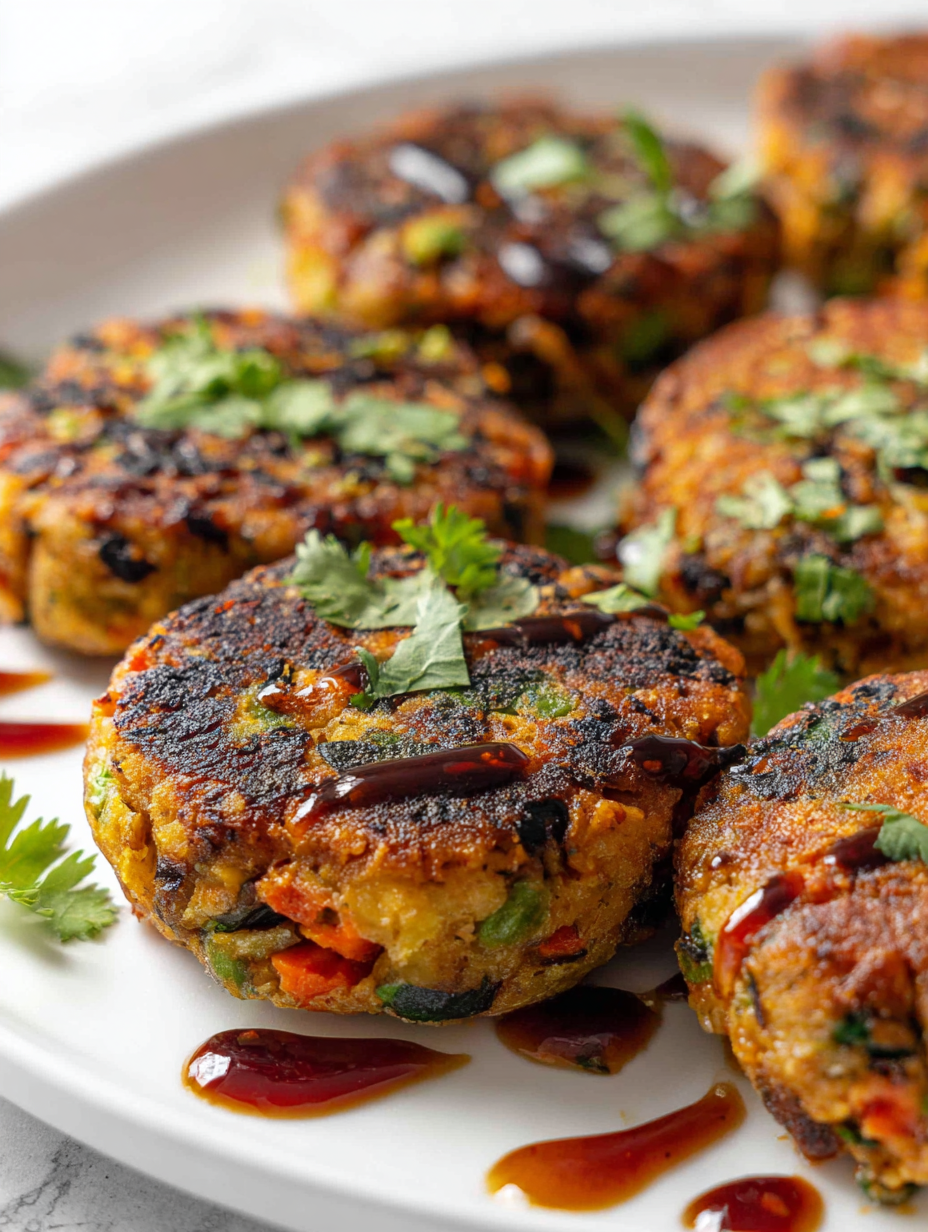
- I love the way crispy edges give way to soft, spicy centers that make every bite a little celebration.
- It’s such a relief to find a snack that’s hearty, veggie-packed, and still totally crave-worthy after all these years.
- I get a little proud when I see my kids gobble these up, especially knowing I snuck in extra carrots and spinach.
- There’s a quiet joy in perfecting the crispness—waiting for that golden glow and crackle that signals they’re just right.
The story behind this recipe
- This recipe was born out of my late-night craving for something crispy and savory, but with a little more substance than usual snacks. One evening, I rummaged through my fridge and found a bunch of leftover vegetables—carrots, spinach, and potatoes—so I threw them together, hoping to turn them into something satisfying. The first batch was a bit rough, but the aroma of cumin and coriander kept me coming back to the pan, tweaking the spices until I finally hit that perfect balance of crispy and tender.
- Every time I make these tikkis, I remember how my grandma used to fry up similar snacks with a pinch of love and a lot of patience. It’s funny how a simple veggie mash can turn into a crispy, golden treat—almost magic, really. These tikkis have become my go-to when I want a quick, comforting bite that hits all the right nostalgic notes but still feels fresh and personal.
- heading: “The story behind this recipe”
Historical & Cultural Notes
- Vegetable tikkis trace their roots to street foods across North India, where vendors sold crispy, spiced patties as quick snacks.
- Originally, these tikkis were a way to use leftover vegetables, turning humble ingredients into flavorful bites on busy days.
- The concept of frying vegetable patties dates back centuries, with regional variations blending local spices and cooking styles.
- In many households, these tikkis hold a nostalgic place, reminding generations of festive gatherings and cozy evenings.
- Modern twists, like baking or gluten-free options, are recent innovations, but the core idea remains a beloved comfort.
Ingredient breakdown
- Potatoes: I like using starchy, fluffy potatoes for a light, airy texture inside. If you prefer a firmer bite, swap for waxy potatoes, but expect a denser tikkis.
- Mixed Vegetables: Carrots and peas add sweetness and color; I often toss in spinach or bell peppers for extra vibrancy. Use what’s fresh—frozen works well, too, but drain excess moisture.
- Spices: Cumin, coriander, and garam masala are my go-to; they give that warm, nostalgic aroma. Adjust to taste—more chili if you want a fiery kick, less for milder bites.
- Binding Agent: I usually mix in a bit of chickpea flour or breadcrumbs. It makes the tikkis hold together better and adds a toasty note. Skip it if your veggies are really moist, but then add a teaspoon of flour.
- Oil: For frying, I prefer vegetable or sunflower oil—neutral and crisp. If you want a healthier version, try baking or shallow frying with less oil, but the crispness will be softer.
- Ginger & Garlic: Fresh, minced, and fragrant, they punch up the flavor with a warm, spicy kick. If you’re out, a pinch of ginger powder or garlic powder works, but fresh really shines.
- Lemon Juice: Brightens the entire dish with a zesty sparkle. Don’t skip it—your taste buds will thank you, especially right after frying when flavors are at their freshest.
Spotlight on key ingredients
Potatoes:
- I prefer starchy, fluffy potatoes for a light, airy interior. Waxy potatoes make the tikkis denser, but still work if you like a firmer bite.
- Mixed Vegetables: Carrots and peas bring sweetness and vibrant color. Feel free to add spinach or bell peppers for extra flavor and visual appeal. Drain excess moisture if using frozen to prevent sogginess.
Spices and Aromatics:
- Ginger & Garlic: Freshly minced, they fill the kitchen with a warm, spicy aroma. If you’re out, a pinch of powdered ginger or garlic can stand in, but fresh really brightens the flavors.
- Spices: Cumin, coriander, and garam masala lend that nostalgic, fragrant warmth. Adjust chili levels to suit your heat preference—more for fiery bites, less for mild.
Notes for ingredient swaps
- Dairy-Free: Swap regular yogurt for coconut or almond yogurt. It keeps the tang but adds a richer, nutty note.
- Gluten-Free: Use chickpea flour or rice flour instead of breadcrumbs for a nutty, earthy flavor and a slightly denser texture.
- Vegan: Replace eggs with flaxseed meal mixed with water (1 tablespoon flaxseed + 3 tablespoons water per egg) for binding.
- Low-Carb: Substitute potatoes with mashed cauliflower for a lighter, less starchy bite, though it will be softer and less crispy.
- Sweet Vegetables: Swap carrots or peas for roasted sweet corn or grated zucchini for a milder, slightly sweeter flavor.
- Extra Heat: Add a pinch of cayenne or chopped green chili to the mixture if you like more spice, balancing well with the other spices.
- Fresh Herbs: Use chopped cilantro or mint for a burst of fresh aroma—skip if you prefer a more subdued flavor.
Equipment & Tools
- Large mixing bowl: Combine ingredients thoroughly
- Potato masher or fork: Mash potatoes smoothly
- Knife: Chop vegetables finely
- Grater: Shred vegetables quickly
- Frying pan: Cook tikkis evenly with crisp edges
- Spatula: Flip and handle tikkis carefully
Step-by-step guide to vegetable tikkis
- Equipment & Tools: Gather a large mixing bowl for combining ingredients, a potato masher or fork for mashing, a sharp knife for chopping vegetables, a grater for shredding, a frying pan (preferably non-stick) for cooking, and a spatula for flipping.
- Peel 2 large potatoes, dice into small chunks, and boil in salted water at 100°C (212°F) for about 15 minutes until tender. Drain and mash thoroughly while still warm.
- Finely chop or grate 1 cup mixed vegetables—carrots, peas, bell peppers, spinach—aim for small, even pieces. Squeeze out excess moisture to prevent sogginess.
- In the mashed potatoes, stir in the chopped vegetables, 1 teaspoon cumin, 1 teaspoon coriander, ½ teaspoon garam masala, 1 teaspoon grated ginger, 2 minced garlic cloves, and a squeeze of lemon juice. Add 2-3 tablespoons chickpea flour or breadcrumbs to bind—adjust if mixture feels too wet.
- Mix everything well until the mixture holds together when shaped. If too sticky, add a bit more flour; if too dry, a splash of water or lemon juice helps.
- Shape the mixture into small, flat patties about 2.5 cm (1 inch) thick. Keep them uniform for even cooking.
- Heat about 4 tablespoons vegetable oil in a frying pan over medium heat (around 160°C/320°F). When shimmering, place tikkis in the pan, leaving space for flipping.
- Fry for 4-5 minutes per side, until golden brown and crispy. Flip gently with a spatula, ensuring they don’t break. They should crackle and smell fragrant as they crisp.
- Remove from pan and drain on paper towels. Rest for 2 minutes before serving to allow the exterior to set a little more.
- Finishing: Serve hot with mint chutney or yogurt. They’re best enjoyed immediately, with a crispy, tender bite that’s still warm and fragrant.
Let the tikkis rest for 2 minutes on paper towels to absorb excess oil. Serve immediately with chutney or yogurt, still warm and crispy. For best results, keep them warm in an oven at 80°C (175°F) if needed before plating.
How to Know It’s Done
- Color: Tikkis should be golden and crisp on the outside.
- Texture: Inner mixture should hold shape but be tender and moist inside.
- Appearance: Even browning with crackling edges indicates perfect frying.
Vegetable Tikkis
Ingredients
Equipment
Method
- Peel the potatoes, dice them into small chunks, and boil in salted water for about 15 minutes until tender. Drain and mash until smooth, setting aside to cool slightly.
- Finely chop or grate the mixed vegetables—carrots, peas, bell peppers, and spinach—then squeeze out any excess moisture to prevent sogginess.
- In a large mixing bowl, combine the mashed potatoes and vegetables. Add cumin, coriander, garam masala, grated ginger, minced garlic, and lemon juice. Mix thoroughly until evenly incorporated.
- Stir in chickpea flour or breadcrumbs gradually, mixing until the mixture is cohesive enough to shape. If it feels too wet, add a bit more flour; if too dry, a splash of water or lemon juice can help.
- Shape the mixture into small, flat patties about 2.5 centimeters (1 inch) thick and uniform in size for even frying.
- Heat vegetable oil in a frying pan over medium heat until shimmering and hot, around 160°C (320°F). Carefully place the tikkis into the hot oil, giving enough space between each.
- Fry the tikkis for about 4-5 minutes per side, flipping gently with a spatula once they turn golden brown and crispy around the edges. Listen for a gentle crackle and smell the fragrant spices as they fry.
- Remove the cooked tikkis from the pan and drain on paper towels to absorb excess oil. Rest for 2 minutes to allow the exterior to set and crisp up further.
- Serve the hot, crispy vegetable tikkis with mint chutney or yogurt for dipping, enjoying their warm, tender interior and crunchy exterior.
Pro tips for perfect vegetable tikkis
- Use a non-stick pan to prevent sticking and get a crisp crust.
- Ensure oil is hot enough before adding tikkis—listen for a gentle crackle.
- Gently shape tikkis to avoid cracks; keep them uniform for even frying.
- Flip only once when edges are deep golden brown to prevent breaking.
- Rest cooked tikkis on paper towels to absorb excess oil and maintain crispness.
- If tikkis aren’t crisp enough, increase the heat slightly and fry a bit longer.
- Use a wide spatula for flipping to support delicate edges and prevent breakage.
Common mistakes and how to fix them
- TOO LITTLE OIL: If tikkis stick, add more oil and fry longer for crispness.
- UNDERCOOKED: If soft inside, cook longer on low heat until golden and firm.
- OVERLY DARK: If burnt edges appear, lower heat and flip sooner.
- MOIST MIXTURE: If mixture is too wet, add more binding flour to hold shape.
Quick fixes and pantry swaps
- If sticking occurs, splash a little hot oil on the tikkis and gently loosen.
- When tikkis are soggy, patch with a quick sprinkle of extra flour and fry longer.
- Splash lemon juice after frying to brighten flavors if they taste dull.
- Shield overcooked edges with a few seconds of lower heat to prevent burning.
- When in doubt, swap frozen peas for fresh; the texture stays firm and vibrant.
Make-Ahead and Storage Tips
- You can prep the vegetable mixture a day ahead; keep it covered in the fridge to preserve freshness and avoid drying out.
- Cooked tikkis stay crisp and flavorful for up to 2 days when stored in an airtight container in the fridge. Reheat in a hot skillet until crispy, about 2-3 minutes per side, with a sensory cue of crackling edges.
- For longer storage, freeze uncooked patties on a baking sheet until firm, then transfer to a zip-top bag. They keep well for up to 1 month; cook directly from frozen, adding a minute or two to frying time.
- Reheated tikkis are best enjoyed immediately to regain their crunch. To reheat, fry or bake at 180°C (350°F) until warmed through and crispy again, with a golden glow and inviting aroma.
Top questions about vegetable tikkis
1. Can I use different potatoes?
Use starchy potatoes like Russet for a fluffy interior that holds together well. Waxy potatoes make them denser but still good.
2. Can I substitute fresh vegetables with frozen ones?
Yes, frozen peas or grated zucchini work well. Drain excess moisture to keep the mixture cohesive.
3. How can I make these spicier or more tangy?
Adding a pinch more spices or chili can boost heat; adjusting lemon juice brightens the flavor after frying.
4. What’s the best binding agent?
A tablespoon of chickpea flour or breadcrumbs helps bind the mixture. For gluten-free, try rice flour.
5. How do I know when they’re cooked?
Fry in medium-hot oil (around 160°C/320°F) until golden and crispy, about 4-5 minutes per side.
6. Can I make these ahead?
Store cooked tikkis in an airtight container in the fridge for up to 2 days. Reheat in a hot skillet to crisp up.
7. Can I bake these instead of frying?
For a healthier version, bake at 180°C (350°F) for about 20 minutes, flipping halfway through until crispy.
8. What if my tikkis fall apart?
If they stick, add a little more oil and fry longer. If too soft, cook on lower heat until firm.
9. How can I prevent them from breaking?
Use a wide spatula to gently flip, and shape evenly for consistent crispness. Rest briefly before serving.
10. How do I boost flavor at the end?
Add a squeeze of lemon or fresh herbs after frying to enhance freshness and aroma.
These vegetable tikkis are more than just a snack; they’re a small act of nostalgia with a modern twist. Every bite offers a crispy, fragrant reminder of home-cooked comfort, especially when shared around a cluttered table.
In a world rushing past, taking the time to fry up a batch feels grounding. They’re perfect for quiet afternoons or casual gatherings—simple, honest, and full of flavor that sticks with you long after the plate is empty.