I’ve always been obsessed with textures in cooking, especially when it comes to veggie dishes. These veggie balls are a playground of contrasts—the crispy edges, the tender insides, and that satisfying bite that makes you want to keep munching. It’s like a little symphony of crunch and chew in every bite.
What drew me to this recipe was how different vegetables and binders come together to surprise you. It’s not just about making a meatless version; it’s about celebrating the varied textures that vegetables can give. Plus, they’re so forgiving—adjust the veggies, tweak the seasonings, and you get a new bite every time.
These veggie balls became a staple for me because they’re flexible, satisfying, and honestly fun to make. They’re perfect for when I want something hearty but still light, and they work just as well as a snack or a main course. The crunch keeps you hooked, and the flavors develop beautifully with a little patience.
Focusing on the texture and crunch of veggie balls, this recipe explores how different vegetables and binders create surprising contrasts and satisfying bites, making it more than just a meatless option.
The textural magic of veggie balls
- These veggie balls remind me of childhood snacks, but with a grown-up crunch that keeps me coming back.
- I love how the crispy edges contrast with the tender insides—it’s a textural dance I never tire of.
- Getting the seasoning just right feels like a small victory, especially when the aroma fills the kitchen with promise.
- Sometimes I toss in a handful of herbs last minute—each batch feels like a little culinary adventure.
The story behind this recipe
- Making these veggie balls was born out of a messy weekend where I had too many leftover vegetables and not enough patience to cook something elaborate. I just started chopping and tossing everything into a bowl, hoping something good would happen. The smell of roasted garlic and toasted breadcrumbs filled the kitchen, turning chaos into a kind of inspiration.
- I realized that the texture was what made these special—crisp outside, tender inside, with a satisfying chew. Each batch felt like a little experiment, tweaking the veggies, the binders, and the seasonings until I found that perfect crunch. It’s become a way to clear out the fridge and turn odds and ends into something worth eating.
- heading: The magic behind these veggie balls
Historical and cultural roots
- Veggie balls have roots in many Mediterranean and Middle Eastern cuisines where vegetable-based patties are a traditional way to use seasonal produce.
- The idea of shaping vegetables into small, portable bites likely evolved from street foods like falafel and veggie fritters, making them easy to eat on the go.
- During wartime shortages, cooks often relied on vegetables and bread crumbs to create filling, satisfying snacks with minimal ingredients.
- Modern veggie ball recipes often incorporate textures and flavors inspired by plant-based trends that emphasize sustainability and health-conscious eating.
Key ingredients in veggie balls
- Carrots: I love how their natural sweetness and firm bite add a subtle contrast—try grating them finely for a smoother texture or chunkier for more chew.
- Zucchini: It’s a moisture magnet, so I squeeze out excess water well—too much, and your balls might fall apart; too little, and they’re soggy. Use fresh or even frozen, just squeeze out moisture.
- Chickpeas: Canned chickpeas are my go-to—mash them until almost smooth but leave some texture. Roasting them briefly can deepen their nutty flavor if you have the time.
- Breadcrumbs: They’re the backbone for binding—use toasted for extra crunch or panko for a lighter bite. I sometimes toss in a pinch of smoked paprika for extra smoky depth.
- Egg (or flaxseed): It’s the glue that holds everything together—if vegan, swap in flaxseed meal mixed with water; it should be thick and gel-like, like a glue stick.
- Herbs & Spices: Fresh parsley or cilantro brighten the mix, but dried herbs work too—just use slightly more, and add them early to let flavors meld.
- Olive Oil: A splash for moisture and flavor—try infused oils like garlic or chili for a flavor punch, especially when frying or baking for that extra shimmer and aroma.
Spotlight on key ingredients
Carrots and Zucchini:
- Carrots: Their natural sweetness and firm bite add a subtle contrast—try grating finely for a smoother texture or chunkier for more chew.
- Zucchini: It’s a moisture magnet, so I squeeze out excess water well—too much, and your balls might fall apart; too little, and they’re soggy. Use fresh or even frozen, just squeeze out moisture.
Notes for ingredient swaps
- Dairy-Free: Use plant-based binders like mashed avocado or silken tofu instead of eggs. The texture stays creamy and rich, but may be a bit softer.
- Gluten-Free: Swap breadcrumbs for crushed gluten-free rice cereal or almond meal. Expect a slightly nuttier flavor and a denser bite.
- Vegan: Replace eggs with flaxseed meal mixed with water (1 tbsp flaxseed + 3 tbsp water per egg). It’s a bit more crumbly but still holds together well.
- Low-Sodium: Use unsalted or lightly salted breadcrumbs and seasonings to control salt levels without sacrificing flavor.
- Herb Variations: Swap parsley for cilantro or basil for a fresher, more aromatic profile that brightens the bite.
- Spice Boost: Add a pinch of smoked paprika or cayenne to give the veggie balls a smoky or spicy kick, enhancing depth of flavor.
- Vegetable Swaps: Use sweet potato instead of carrots for sweetness or kale for an earthy note. Adjust cooking time as needed.
Equipment & Tools
- Grater: To shred vegetables finely.
- Large mixing bowl: To combine ingredients evenly.
- Skillet or frying pan: For frying the veggie balls.
- Baking sheet and parchment paper: For baking if preferred.
- Spatula or tongs: To turn and handle hot balls.
- Measuring spoons and cups: To measure ingredients accurately.
Step-by-step guide to veggie balls
- Gather all ingredients: vegetables, breadcrumbs, eggs (or flaxseed), herbs, spices, oil, and tools. Preheat oven to 200°C (390°F) if baking or prepare a skillet for frying.
- Finely grate carrots, zucchini, and any other veggies. Squeeze excess moisture from zucchini with a clean towel. Set aside.
- In a large bowl, mash chickpeas with a fork until mostly smooth but still textured. Add grated veggies, breadcrumbs, herbs, spices, and beaten egg or flaxseed mixture.
- Mix everything thoroughly until combined. If the mixture feels too loose, add more breadcrumbs; if too dry, a splash of water or oil helps. Let sit for 10 minutes to allow flavors to meld.
- Shape the mixture into small balls, about 1.5 inches diameter. Keep hands damp to prevent sticking.
- Heat oil in a large skillet over medium heat (around 180°C / 355°F). When hot, add veggie balls, ensuring they don’t touch. Fry for 4–5 minutes, turning occasionally, until golden and crispy on all sides.
- Alternatively, place the balls on a lined baking sheet and bake for 20–25 minutes, turning halfway through, until crisp outside and cooked through.
- Check for doneness: the exterior should be golden brown, and the inside should be firm but tender. They should jiggle slightly when moved but hold their shape.
- Remove from heat and let rest for 2 minutes. Serve hot with your favorite dipping sauce or atop a fresh salad.
Let the veggie balls rest for 2 minutes after cooking to settle. Serve immediately, garnished with herbs or a squeeze of lemon if desired. For extra crispness, pop them in a hot oven for 5 minutes before serving.
How to Know It’s Done
- Color: Golden brown exterior with crispy edges.
- Texture: Firm but tender inside, with a slight chew.
- Appearance: Holds shape without cracking or falling apart.
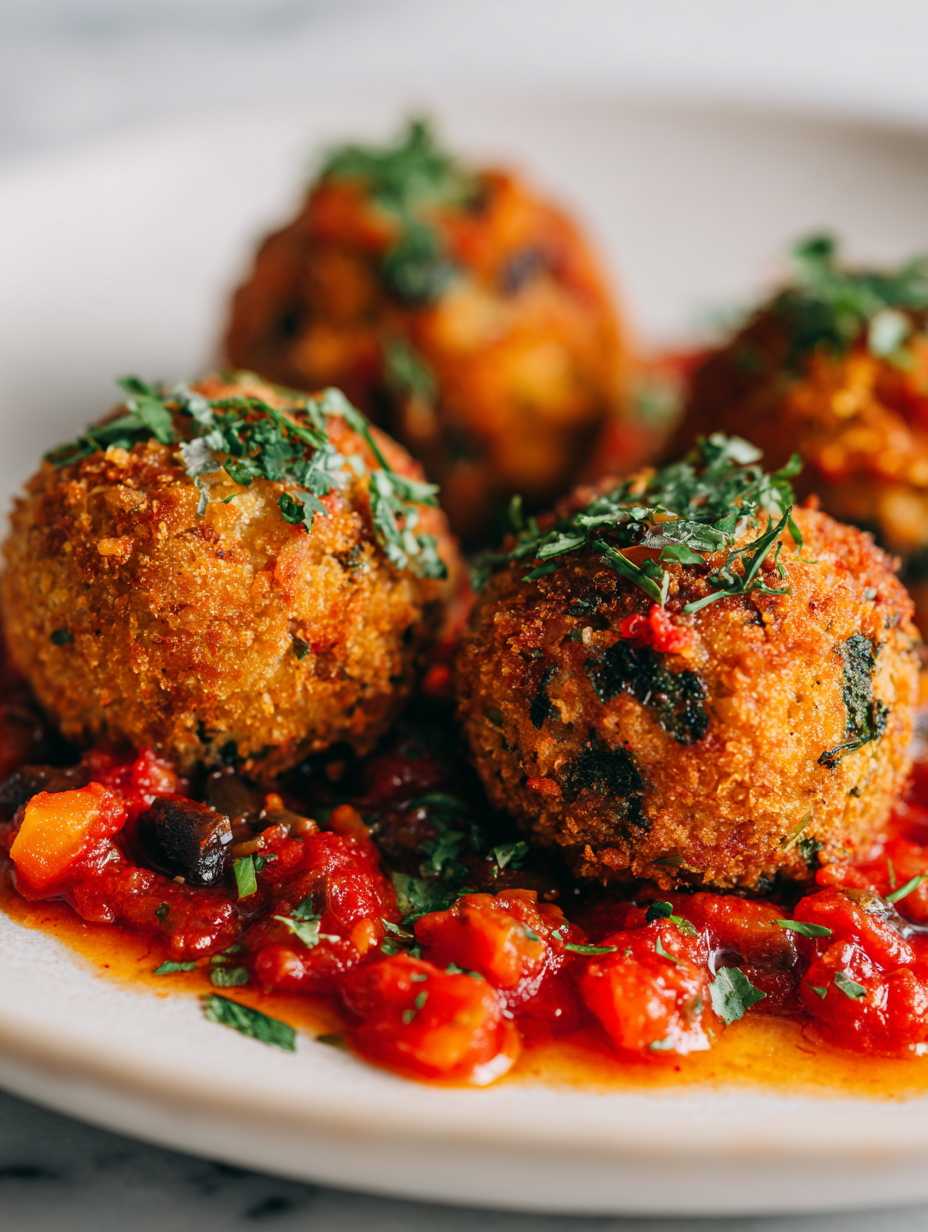
Veggie Balls with Contrasting Textures
Ingredients
Equipment
Method
- Gather all your ingredients: grated carrots, zucchini, mashed chickpeas, breadcrumbs, egg, herbs, spices, and oil. Preheat your skillet over medium heat or set your oven to 200°C (390°F) and line a baking sheet with parchment paper.
- Using a grater, finely shred the carrots and zucchini. After grating the zucchini, squeeze out excess moisture with a clean towel—this helps prevent sogginess and ensures your veggie balls hold together.
- In a large bowl, mash the chickpeas with a fork until mostly smooth but still slightly chunky for texture.
- Add the grated vegetables, breadcrumbs, chopped herbs, spices, and beaten egg to the mashed chickpeas. Mix everything thoroughly until well combined. The mixture should be sticky but manageable.
- If the mixture feels too loose, sprinkle in a little more breadcrumbs; if too dry, add a small splash of water or oil. Let the mixture rest for 10 minutes—this helps the flavors meld and the mixture firm up.
- Using damp hands, shape the mixture into small balls, about 1.5 inches in diameter. Keep your hands moist to prevent sticking and to create smooth, uniform shapes.
- If frying, heat the olive oil in your skillet over medium heat until it shimmers and makes a gentle crackling sound. Carefully add the veggie balls, ensuring they aren’t overcrowded. Fry for 4–5 minutes, turning occasionally, until each side is golden and crispy.
- Alternatively, arrange the shaped veggie balls on your prepared baking sheet. Bake in the preheated oven for 20–25 minutes, turning once halfway through, until they are crispy and golden all over.
- Once cooked, transfer the veggie balls to a plate and let them rest for 2 minutes. This brief pause helps them set and makes handling easier.
- Serve hot with your favorite dipping sauce or atop a fresh salad. Enjoy the crispy exterior and tender inside that make these veggie balls so satisfying.
Pro tips for perfect veggie balls
- Bolded Mini-Head: Use a gentle hand when shaping the balls to keep their structure intact.
- Bolded Mini-Head: Keep your hands damp while forming to prevent sticking and ensure smooth shapes.
- Bolded Mini-Head: When frying, do not overcrowd the pan; work in batches for even crispness.
- Bolded Mini-Head: For a crispy exterior, ensure oil is hot enough—test with a small piece first, it should crackle immediately.
- Bolded Mini-Head: Rest the cooked veggie balls briefly before serving to allow flavors to settle and set their shape.
- Bolded Mini-Head: For extra crunch, bake the balls on a wire rack instead of a baking sheet to allow even heat circulation.
Common mistakes and how to fix them
- FORGOT to squeeze excess moisture → Drain veggies thoroughly for better binding.
- DUMPED the egg mixture too early → Let the mixture rest for 10 minutes before shaping.
- OVER-TORCHED the veggie balls → Cook on medium heat, watch for golden crust without burning.
- MISSED the resting step → Rest cooked balls for 2 minutes to set their shape.
Quick Fixes and Pantry Swaps
- When mixture feels too loose, add a pinch more breadcrumbs to firm it up.
- Splash a little water or oil if veggie balls crack during frying, for better cohesion.
- Patch over cracks with a tiny dab of mixture while frying to prevent falling apart.
- Shield delicate veggie balls from direct flame to avoid over-torched edges, use medium heat.
- If the oil shimmers but doesn’t crackle, increase heat slightly for crispier results.
Prep, store, and reheat tips
- Prep the shredded vegetables and mash the chickpeas a day in advance; store in airtight containers in the fridge. They’ll stay fresh for up to 24 hours and save time during assembly.
- Shape the veggie balls ahead of time and keep them covered in the fridge for up to 12 hours. They might firm up slightly, making them easier to handle later.
- Cooked veggie balls can be stored in an airtight container in the fridge for up to 3 days. Reheat in a hot oven or skillet until crispy, about 5 minutes, until they crackle slightly and smell toasted.
- Freezing is a great option—place shaped balls on a tray, freeze for 1-2 hours, then transfer to a freezer bag. They keep for up to 3 months and can be baked directly from frozen, adding 5-7 minutes to baking time.
Top questions about Veggie Balls
1. How do I shape veggie balls without them falling apart?
Use a gentle touch when shaping; wet hands help prevent sticking and keep them smooth.
2. How do I know when the veggie balls are cooked?
Cook until golden and crispy outside, with a firm but tender inside—about 4-5 minutes per batch.
3. Why are my veggie balls cracking in the pan?
If they crack during frying, lower the heat slightly and handle with care to prevent breakage.
4. Can I bake these veggie balls instead of frying?
You can bake them at 200°C (390°F) for 20-25 minutes until crispy and cooked through.
5. How do I handle zucchini to prevent sogginess?
Use fresh or frozen grated zucchini; always squeeze out excess water to avoid soggy balls.
6. Can I freeze veggie balls for later?
Yes, you can freeze shaped veggie balls on a tray, then transfer to a bag; bake from frozen for 25 minutes.
7. What if I need a gluten-free version?
Use gluten-free breadcrumbs or crushed rice cereal if you’re avoiding gluten; expect a slightly different texture.
8. Can I change up the herbs in the recipe?
Add herbs like parsley or cilantro to brighten flavors; dried herbs work too but need a bit more time to infuse.
9. How hot should the oil be when frying?
Ensure your oil is hot enough (around 180°C/355°F) before frying; it should crackle when you add the veggie balls.
10. Should I rest the veggie balls after cooking?
Let the cooked veggie balls rest for a couple of minutes to set their shape and develop flavor.
These veggie balls remind me that satisfying textures can turn simple vegetables into something memorable. They’re a little messy to make, but the result—a crispy outside and tender inside—keeps me coming back. Plus, they’re versatile enough to serve with anything from quick dips to hearty salads.
In times when I need a quick, comforting bite that’s still healthy, this recipe is my go-to. It’s honest, imperfect, and full of small surprises in every batch. No matter how often I make them, there’s always a new tweak or flavor burst to discover.