
Making your own baked corn chips at home is about reclaiming a snack that’s often filled with preservatives and artificial flavors. There’s something honest and satisfying in mixing simple cornmeal, a pinch of salt, and a drizzle of oil, then watching it turn crispy in the oven. It’s a small act of rebellion against the overly processed snacks we often reach for without thinking.
This recipe is about reconnecting with the roots of a classic treat, stripping it down to its basics. No frying, no neon colors—just natural, toasted corn flavor and a satisfying crunch that’s perfect for dipping or snacking straight from the tray. It’s easy to customize, too, adding a hint of spice or herbs if you want a little twist.
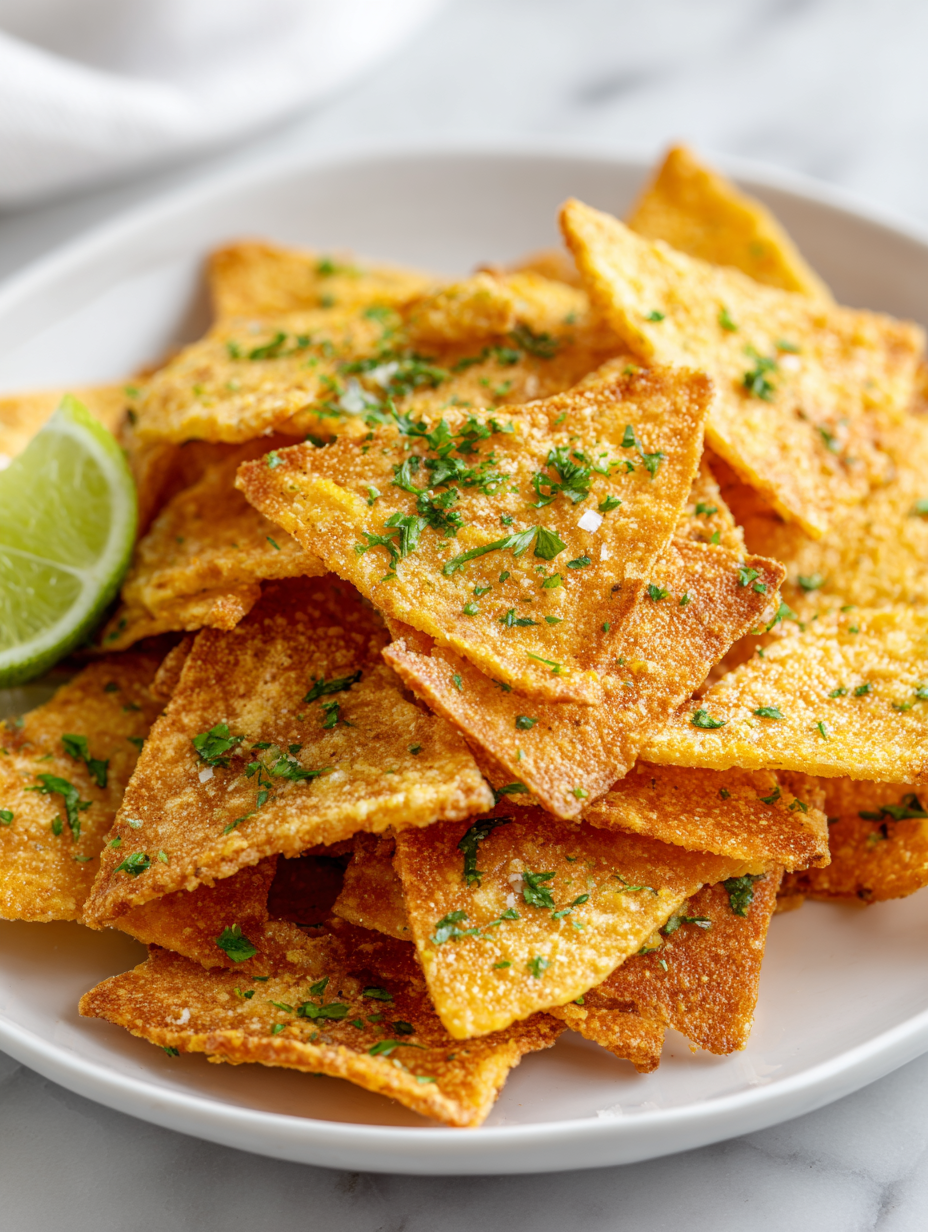
This batch of homemade baked corn chips is a reminder that good snacks don’t have to come from a bag. There’s a certain pride in making something from scratch that is both fresh and wholesome. It’s also a chance to slow down for a moment, to measure, to watch the edges turn golden, and to smell that toasty corn aroma fill your kitchen.
Plus, it’s surprisingly forgiving—if the first batch isn’t perfect, you learn, tweak, and get closer each time. It’s not about perfection; it’s about the process, the texture, and that unmistakable, nostalgic crunch that makes every bite feel like a little celebration.
Focusing on a nostalgic, homemade version of corn chips that skips the store-bought junk, emphasizing simple ingredients and a hands-on process that reconnects you with the snack’s roots.
The story behind this recipe
I first made these baked corn chips on a rainy afternoon, driven by a craving for something crispy but wholesome. I wanted a snack that was simple enough to throw together without fuss, but still packed with flavor. The smell of toasted corn filling the kitchen always takes me back to childhood weekends spent snacking on homemade treats, quiet moments of comfort. This recipe is my way of reclaiming that nostalgia, turning it into something I can make whenever I need a quick, satisfying bite.
Ingredient breakdown: key components
- Fresh cornmeal: It’s the base, gives that unmistakable corn flavor. Use good quality, stone-ground if you can, for more depth.
- Salt: Enhances everything, but don’t go overboard—just a pinch to bring out the natural sweetness of the corn.
- Oil: I prefer a neutral oil like canola or light olive oil for a crispy finish. Too much oil makes them greasy, so just enough to coat.
- Water: Helps bind the dough, should be just enough to bring everything together without making it sticky. Adjust if needed.
- Optional spices: I love a little smoked paprika or chili powder for a smoky punch or heat. Add sparingly and taste as you go.
- Corn kernels (if using fresh): Adds a bit of texture and sweetness, but dried cornmeal works perfectly. Fresh is more rustic, though.
- Lemon juice or vinegar (a splash): Brightens flavors, especially if you’re adding herbs or spices. Just a quick squeeze or splash helps.
Spotlight on key ingredients
Cornmeal:
- Fresh cornmeal: It’s the base, gives that unmistakable corn flavor. Use good quality, stone-ground if you can, for more depth.
- Salt: Enhances everything, but don’t go overboard—just a pinch to bring out the natural sweetness of the corn.
- Oil: I prefer a neutral oil like canola or light olive oil for a crispy finish. Too much oil makes them greasy, so just enough to coat.
Spices & Acid:
- Lemon juice or vinegar: A splash brightens flavors and adds a subtle zing that enhances the corn’s natural sweetness.
- Optional spices: Smoked paprika or chili powder bring smoky warmth or fiery kick, but keep it balanced so the corn shines through.
Notes for ingredient swaps
- Dairy-Free: Use coconut oil instead of butter or dairy fats for a subtle coconut aroma and equally crispy chips.
- Gluten-Free: Substitute with rice or chickpea flour if you want to avoid wheat-based ingredients, but expect a slightly different texture.
- Low-Sodium: Reduce salt by half or skip entirely, focusing on the natural sweetness and corn flavor to shine through.
- Spice Variations: Swap smoked paprika for cumin or add cayenne for more heat—adjust to your spice tolerance.
- Sweet Version: Mix in a touch of cinnamon and sugar before baking for a snack with a sweet, toasty flavor.
- Extra Crunch: Brush with a thin layer of oil before baking and bake a few extra minutes until deeply golden and crackly.
- Herb Infusion: Add finely chopped fresh herbs like cilantro or thyme to the dough for a fragrant twist.
Equipment & Tools
- Baking sheet: To hold the chips for baking evenly.
- Parchment paper: Prevents sticking and makes cleanup easier.
- Rolling pin: To roll out the dough evenly.
- Sharp knife or pizza cutter: To shape the chips cleanly.
- Wire rack: To cool the chips and maintain crispness.
Step-by-step guide to baked corn chips
- Preheat your oven to 180°C (350°F). Gather a baking sheet and a rolling pin. Line the sheet with parchment for easy cleanup.
- In a mixing bowl, combine 1 cup of cornmeal, ½ teaspoon of salt, and optional spices like smoked paprika or chili powder. Mix well.
- Gradually add ¼ cup of warm water and 1 tablespoon of oil. Stir until a dough forms. If it’s too crumbly, add a tiny splash more water.
- Knead the dough briefly in the bowl until smooth. Roll it out between two sheets of parchment to about 2mm thickness. Use a rolling pin for evenness.
- Cut the dough into triangles or your preferred shapes with a sharp knife or pizza cutter. Transfer to the prepared baking sheet with a spatula.
- Bake for 12-15 minutes. Keep an eye on them—edges should turn golden and crisp, smelling toasty and sweet. If they brown too fast, lower the temp slightly.
- Remove from oven and let cool on a wire rack for 5 minutes. They will firm up as they cool, developing a satisfying crunch.
- For extra crispiness, return to the oven for another 2-3 minutes if needed. If they seem dull or soft, give them a quick blast in a hot oven for 1 minute.
- Finish by sprinkling a little more salt if desired. Serve warm or at room temperature, perfect for dipping or snacking straight from the tray.
Let the chips cool on a wire rack for at least 5 minutes. Serve once cooled slightly for maximum crunch and flavor. Store any leftovers in an airtight container at room temperature for up to 2 days, re-crisp in a quick 1-minute blast in the oven if needed.
How to Know It’s Done
- Edges are golden and slightly darker, with a firm, crisp texture.
- Chips crackle when broken or bitten, indicating proper crispness.
- Color is uniform, with no pale spots or burnt edges.
Homemade Baked Corn Chips
Ingredients
Equipment
Method
- Preheat your oven to 180°C (350°F) and line a baking sheet with parchment paper.
- In a mixing bowl, combine the cornmeal, salt, and any optional spices, then whisk to distribute evenly.
- Add the oil and warm water to the dry mixture and stir with a spoon or spatula until a cohesive dough forms. The dough should be firm but pliable; add a tiny splash more water if it feels too crumbly.
- Knead the dough briefly in the bowl to bring it together into a smooth ball. Cover and let it rest for a minute to relax the gluten.
- Place the dough between two sheets of parchment paper and roll it out evenly to about 2mm thickness, aiming for a smooth, flat surface.
- Use a sharp knife or pizza cutter to cut the dough into triangles, squares, or your preferred shapes. Carefully transfer the cut pieces onto the prepared baking sheet.
- Bake in the preheated oven for 12-15 minutes, or until the edges are golden brown and crisp, filling your kitchen with a toasty corn aroma.
- Once baked, remove the chips from the oven and transfer them to a wire rack to cool for about 5 minutes. They will become crunchier as they cool.
- If desired, sprinkle additional salt or spices over the chips while still warm to help the seasonings stick.
- Enjoy your homemade baked corn chips immediately or store in an airtight container at room temperature for up to two days. For extra crispness, reheat briefly in a hot oven before serving.
Pro tips for perfect baked chips
- Use a light hand with oil—just enough to lightly coat the dough for crispness without greasiness.
- Roll the dough evenly to about 2mm—thin enough for crunch, thick enough to hold shape.
- Keep an eye on the oven—chips can go from perfect to burnt quickly, especially around edges.
- Use a sharp cutter or knife—clean cuts ensure uniform baking and texture.
- Cool on a wire rack—allows excess moisture to escape and keeps chips crispy.
- Season immediately after baking—adding salt or spices right out of the oven helps them stick better.
Common mistakes and how to fix them
- FORGOT to preheat the oven: Always set it early to ensure even baking and crisp chips.
- DUMPED too much oil: Use just enough to coat for crispy chips without greasiness.
- OVER-TORCHED edges: Lower the oven temp slightly if edges darken too fast, watch closely.
- FAILED to cut evenly: Use a sharp cutter for uniform shapes; uneven chips bake unevenly.
Quick fixes and pantry swaps
- If chips are dull, splash a little more oil and bake a few extra minutes for crispness.
- When chips stick together, patch apart gently with a spatula while hot to prevent breakage.
- Splash a bit of lemon juice or vinegar if chips taste flat or dull to brighten flavors.
- DUMPED too much salt? Rinse chips quickly, dry thoroughly, and bake again for a less salty crunch.
- When chips burn at the edges, shield with foil or lower oven temperature to prevent over-torching.
Prep, store, and reheat tips
- Prepping the dough a day ahead: Mix and knead the dough, then wrap tightly in plastic. Keeps well in the fridge for up to 24 hours, and the flavor deepens overnight.
- Storing baked chips: Once cooled completely, store in an airtight container at room temperature for up to 2 days. They stay crispy if kept dry, but might soften slightly over time.
- Reheating tips: For extra crunch, reheat in a hot oven at 180°C (350°F) for 3-5 minutes. Listen for that crackle and watch for slight browning around the edges.
- Shelf life and sensory notes: Freshly baked chips are best within a day or two. They should smell toasty, with a firm, crackling texture when reheated properly.
Top questions about baked corn chips
1. How do I know when baked corn chips are done?
Look for chips that are golden brown and firm to the touch. They should crackle when broken. If they feel soft, they need more baking time.
2. Can I use different oils or fats?
Use a neutral oil like canola or light olive oil for crispiness. If you prefer a smoky flavor, a splash of smoked paprika in the dough works well.
3. Can I make these gluten-free?
Yes, you can substitute with gluten-free flours like rice or chickpea, but expect a slightly different texture and flavor. Adjust water as needed.
4. How should I store leftovers?
Store cooled chips in an airtight container at room temperature for up to 2 days. Reheat in a hot oven for 3-5 minutes until crispy with a crackle.
5. How do I fix soggy chips?
For extra crunch, re-bake slightly longer or at a higher temperature for a minute or so. Watch carefully to avoid burning the edges.
6. Can I prepare these ahead?
Pre-cook the dough, then freeze in portions. Bake straight from frozen, adding a few extra minutes. Flavors deepen overnight in the fridge.
7. Why are my chips unevenly baked?
If chips are unevenly baked, rotate the baking sheet halfway through baking. Use a sharp cutter for uniform shapes for even baking.
8. How can I customize the flavor?
Add spices like chili powder or cumin to the dough before baking for a flavor boost. Adjust quantities to taste, and aim for a balanced spice level.
9. How do I cut the chips evenly?
Use a sharp knife or pizza cutter for clean, even shapes. Thinner cuts bake more crisply. Keep dough at a consistent thickness for uniform crunch.
10. What if my chips burn?
If chips burn at the edges, lower oven temperature slightly and bake a little longer. Use parchment paper to prevent sticking and uneven browning.
Making these baked corn chips at home is a small act of reclaiming snack time, filling the kitchen with toasty, sweet corn aroma. They’re a reminder that simple, honest ingredients can turn into something satisfying and nostalgic, especially when you’re craving a crunchy bite without fuss.
Once you get the rhythm down, these chips become a go-to for quick snacks or unexpected guests. They’re imperfect, just like real life, but packed with flavor and a bit of homemade pride. That crispy, golden crunch will stick with you long after the last chip is gone.